8x8 square cut 2
T top 8 long 1 1/2 inch bottom
of T is 6" long 6" wide cut 2
T should be 6" long 1" wide
Bottom of T is 5 1/2 x 5 1/2 cut 2
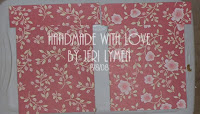
Cover both sides with favorite paper
using a paper glue like "YES" it will
not warp your chipboard.

After covering all parts and allowing good drying time
24 hours before going any futher.
On the last T page put 2 eyelets in and put your
pull ribbon in.
Connecting your Telescope Page. Lay the T with the
Ribbon at the bottom and the T into next T page.
Using Eyelets Secure underneath the T on both sides.
This will allow your page to slide up inside.
Take an eyelet on either side of the top T and secure it
so the bottom T cannot go past the top of 2nd T.
Repeat the process only in your 8x8 page.
You bottom page should be slid up inside of the middle
T now push both into the 8x8 page and Secure with
6 eyelets at the top spaced evenly.
suggestions when putting pictures on the pages, use
Bumpers around your picture, either gems or Brads that
have some height, because this is a slide page, your pictures
if they are not protected will get scratched.
This was designed to be used in a Word book, if you are
wanting to use it in a scrapbook you will need to change
your dimensions of your top page to be an 1" shorter than
your page protector, because you will have to slice one side
of your page protector to get it in, and then you can use a
brad or an eyelet to seal it back together at the top corner.
Hope you have fun with this design by Jeri


